

Completed Code
View the completed code for this tutorial.
- Enable users who don’t have a wallet to login with email to your app (“Embedded Wallets”)
- Sponsor transactions for your users so they don’t have to pay gas (“Smart Wallets”)
Embedded wallets are self-custodial wallets provisioned by Privy itself for a wallet experience that is directly embedded in your application. Embedded wallets do not require a separate wallet client, like a browser extension or a mobile app, and can be accessed directly from your product. These are primarily designed for users of your app who may not already have an external wallet, or don’t want to connect their external wallet. Smart wallets are programmable, onchain accounts that incorporate the features of account abstraction. With just a few lines of code, you can create smart wallets for your users to sponsor gas payments, send batched transactions, and more.We will be implementing both using Privy + Pimlico.
⚠️ Prerequisites
There are a few steps you have to complete before you can start the tutorial.- Create a new project on Privy’s Dashboard
- Copy your “App ID” under “App settings > API keys”. In your local project, make a
.envfile and add your App ID:
.env
- On your project dashboard, enable Smart Wallets under “Wallet Configuration > Smart wallets” and select “Kernel (ZeroDev)” as shown below:
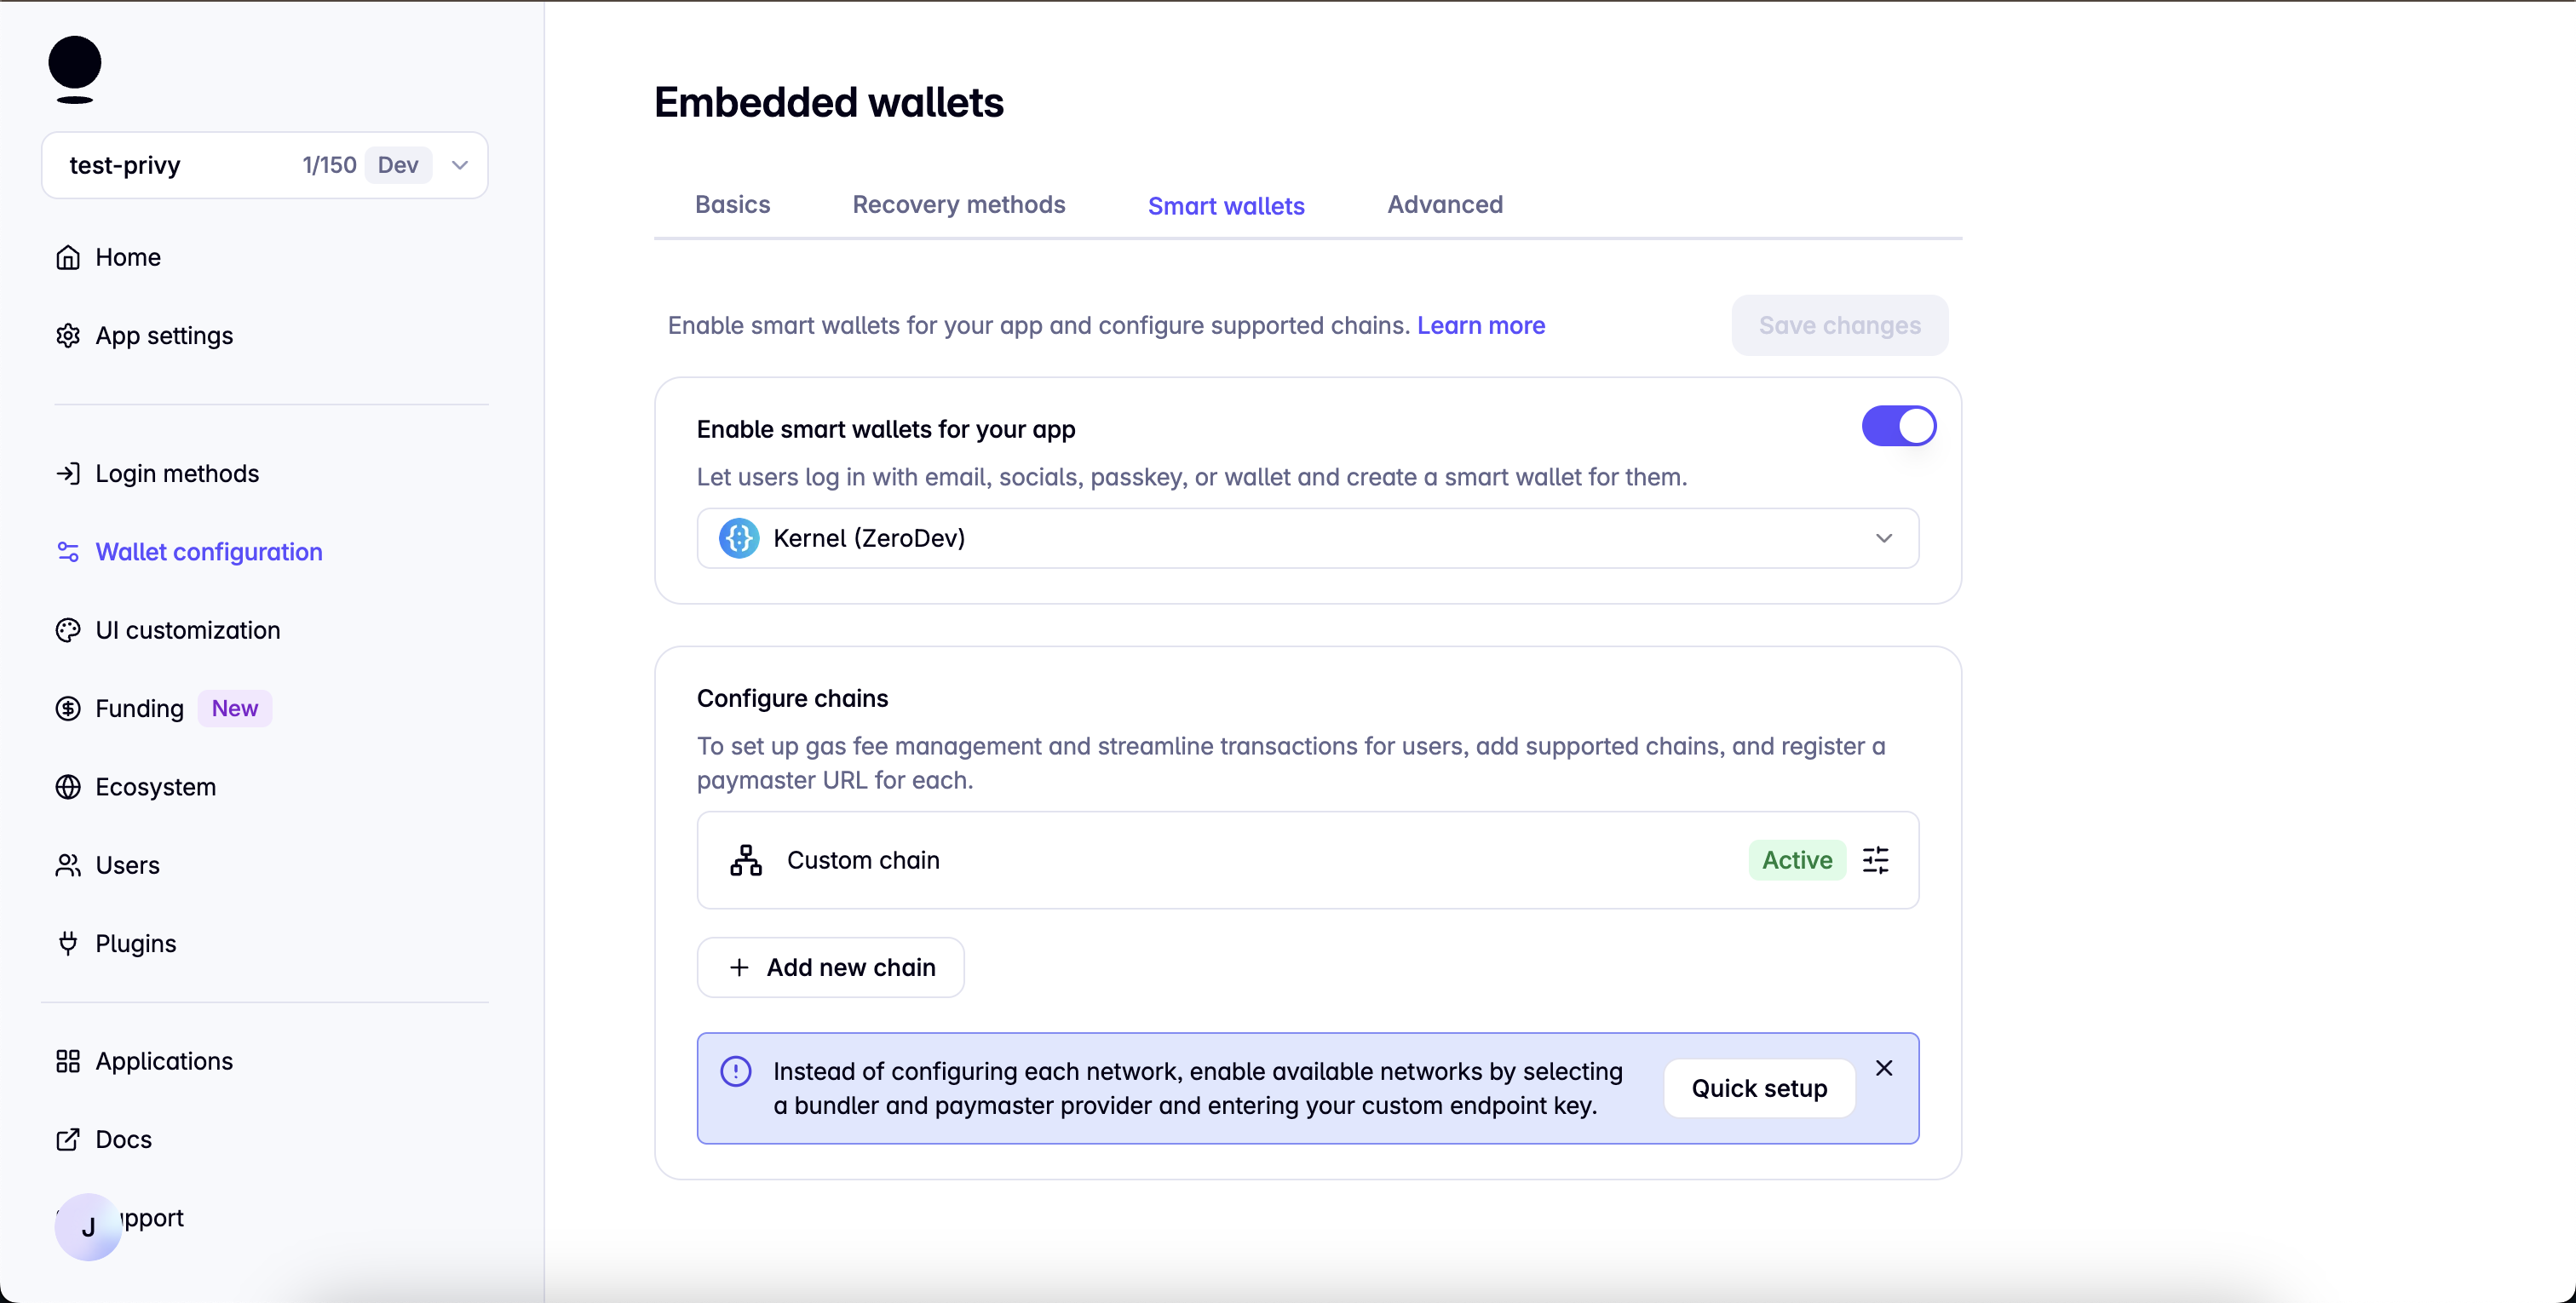
- Once you enable Smart wallets, right underneath make sure to put a “Custom chain” with the following values:
- Name:
Aeneid Testnet - ID number:
1315 - RPC URL:
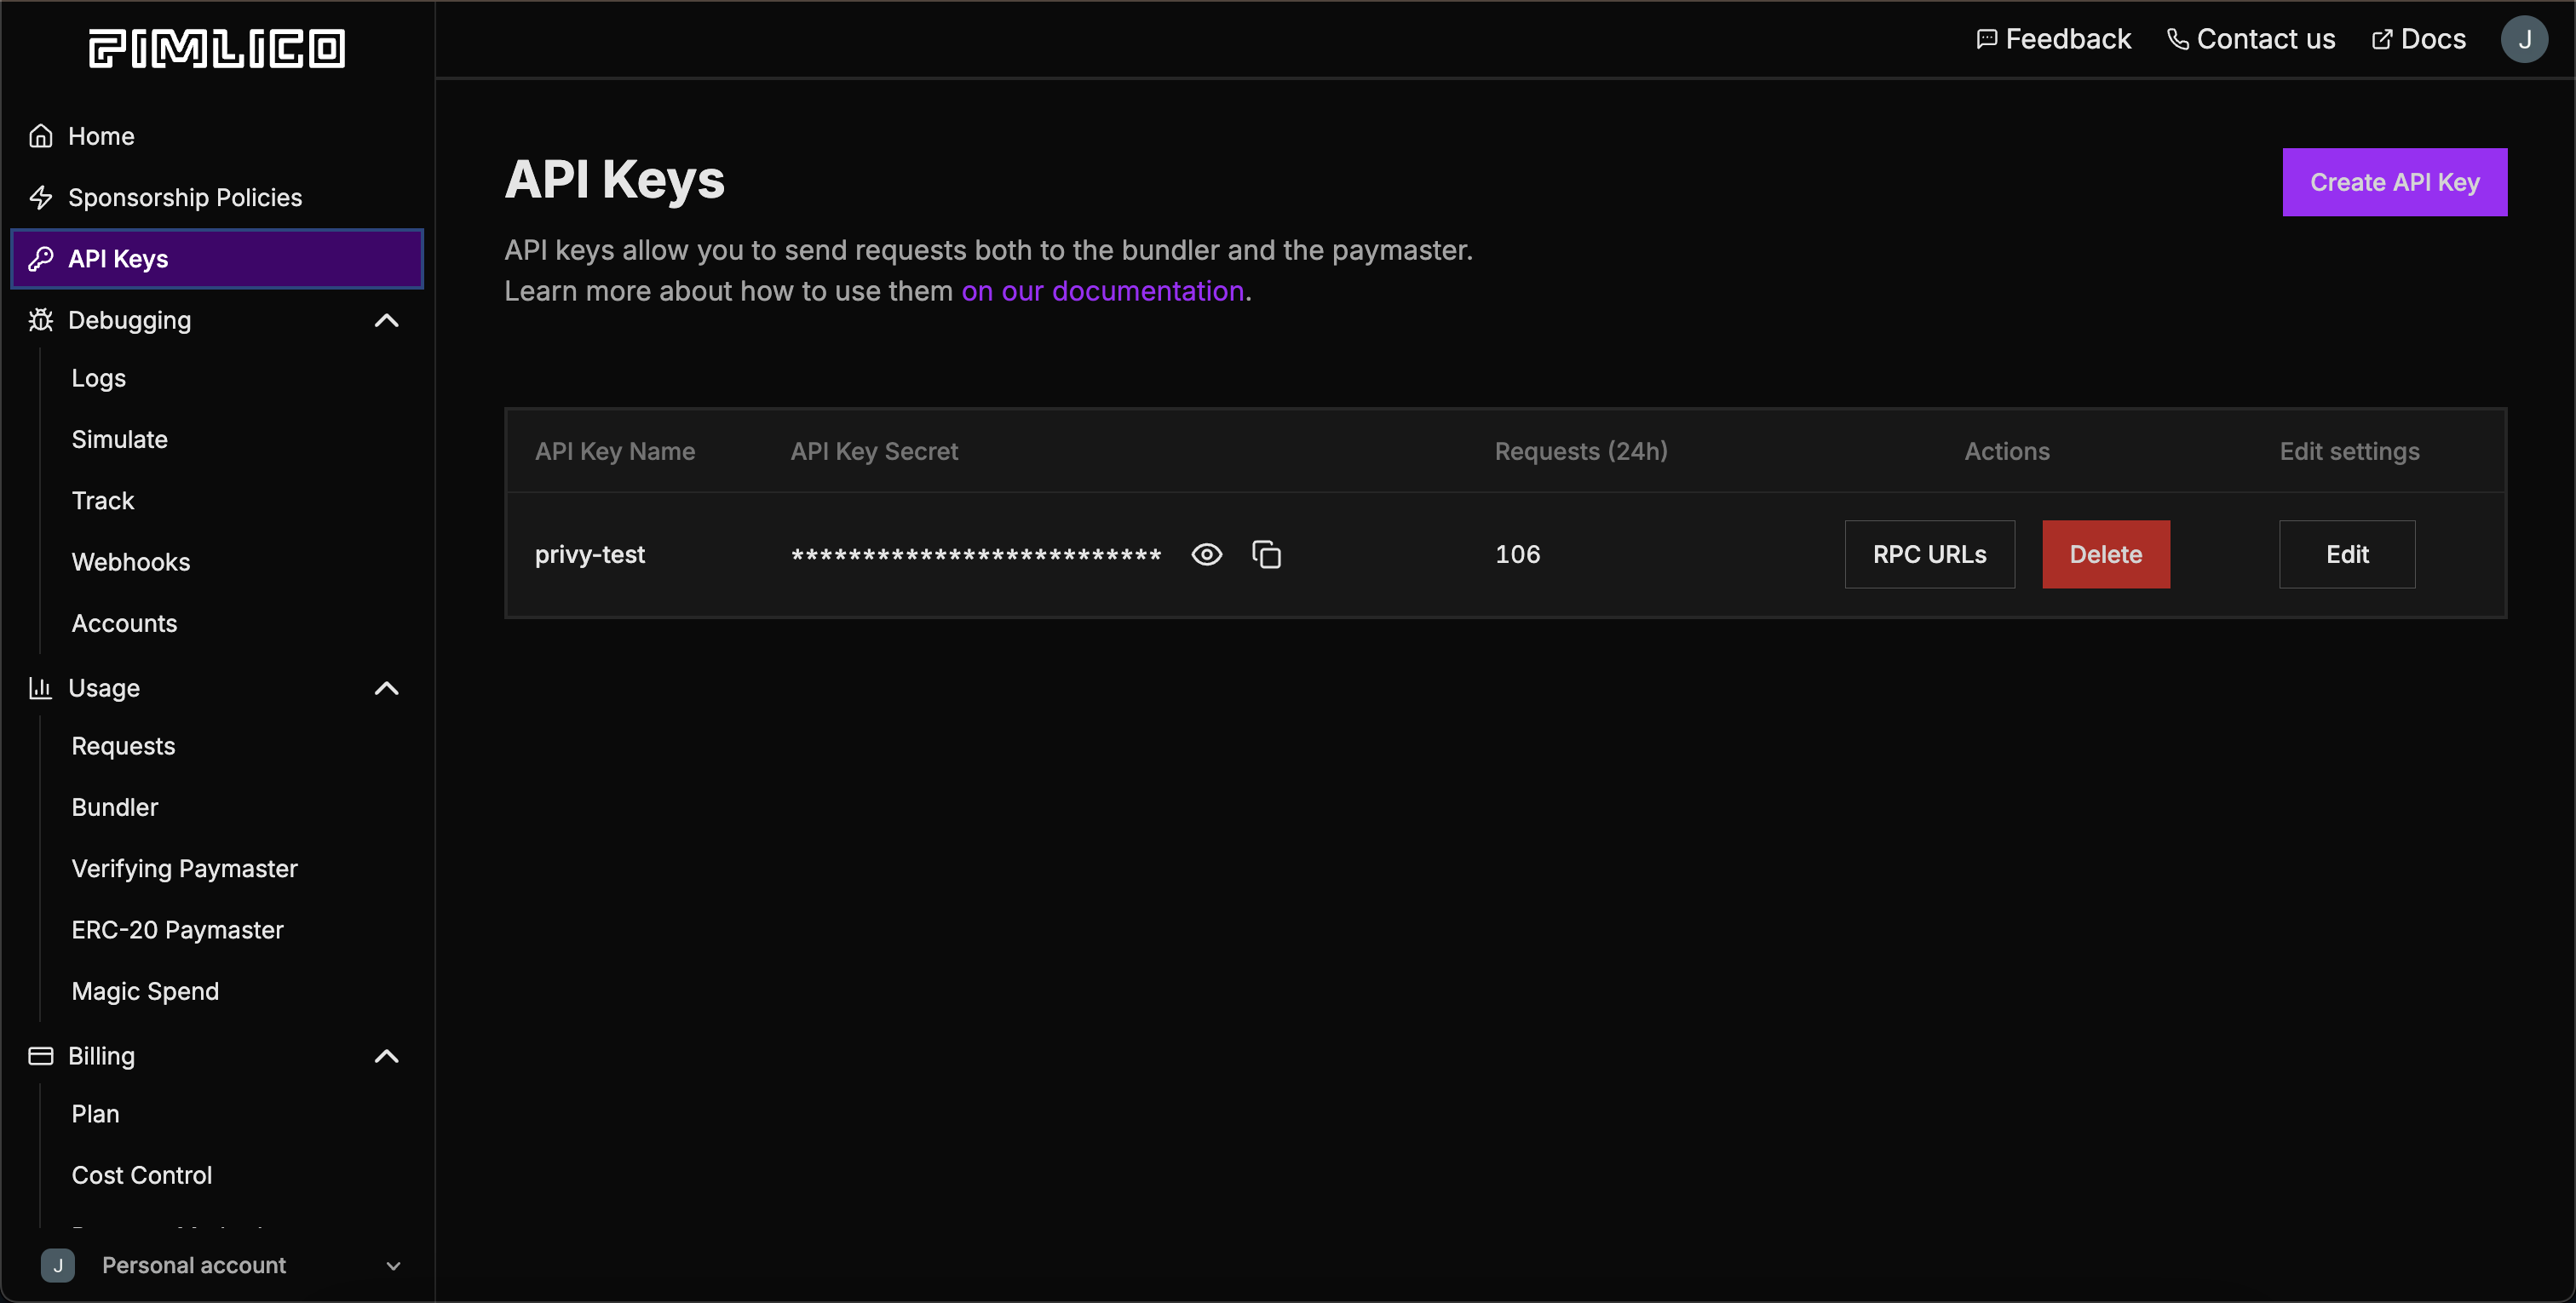
https://aeneid.datarpc.io - For the Bundler URL and Paymaster URL, go to Pimlico’s Dashboard and create a new app. Then click on “API Keys”, create a new API Key, click “RPC URLs” as shown below, and then select “Aeneid Testnet” as the network:
- Name:
- Install the dependencies:
Terminal
1. Set up Embedded Wallets
Official Privy Tutoral
Follow Privy’s official tutorial for setup instead of reading this step.
This part of the Privy documentation
here
describes setting up Embedded Wallets automatically, which is a fancy way of
saying it supports email login, such that when a user logs in with email it
creates a wallet for them. In the below example, we simply create an embedded
wallet for every user, but you may want more customization by reading their
tutorial.
PrivyProvider and SmartWalletsProvider. In a providers.tsx (or whatever you want to call it) file, add the following code:
providers.tsx
layout.tsx like so:
layout.tsx
2. Login & Logout
You can add email login to your app like so:page.tsx
3. Sign a Message With Privy
Official Privy Tutoral
Follow Privy’s official tutorial for signing messages instead of reading
this step.
page.tsx
4. Send an Arbitrary Transaction
Official Privy Tutoral
Follow Privy’s official tutorial for sending transactions instead of reading
this step.
5. Send a Transaction From DATA Foundation SDK
We can also use the generated smart wallet to send transactions from the 🛠️ TypeScript SDK. Some of the functions have an option to return theencodedTxData, which we can use to pass into Privy’s smart wallet. You can see which functions support this in the SDK Reference.
page.tsx
6. Done!
Completed Code
View the completed code for this tutorial.
Learn More
Explore more tutorials in our documentation